Thursday, 27 March 2014

Further Adventures in Sewing - Purse

I wanted to have a go at making a purse using a purse frame.

I picked a sew in frame found a pattern and hey presto -


I shall be making more :)

Friday, 21 March 2014

Budget Hair

I decided that I wanted to dye my hair but having no job means no money which left me looking longingly at the boxes of hair dye in Boots. But undeterred I decided to pop into Savers, now I have been into Savers before only I've generally also just walked straight back out but I am trying to embrace the budget stores so I did have a proper look and was really surprised at what was on offer.

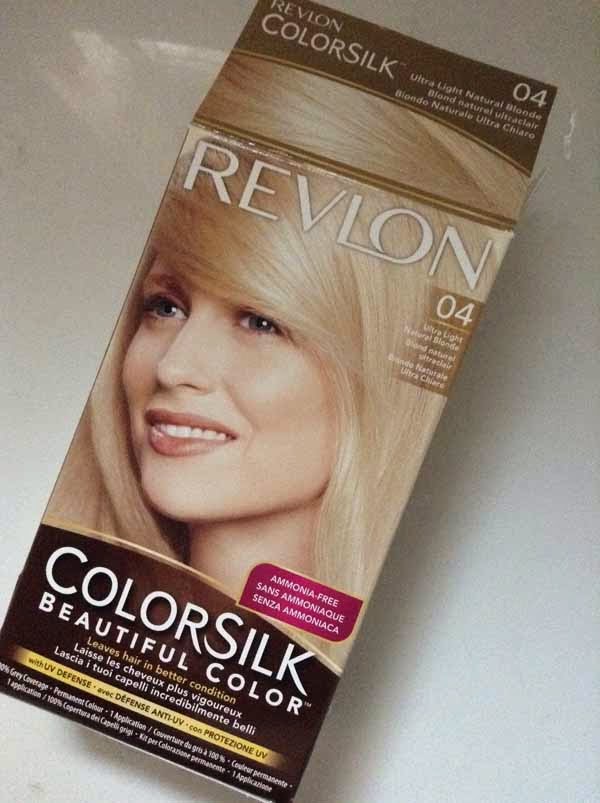
So on the the hair dye, they had the big brands but I decided to be brave and try a more purse friendly budget dye (well not that brave as I at least stuck to a brand I'd heard of though obviously more familiar with the make-up) - Revlon Colorsilk in 04 Ultra Light Natural Blonde. This was around £3 per box.


So the before shot:


My hair was a real mix of faded red and pink with a little of my natural blonde mixed in and as you can see I have long hair so I brought two boxes. As always in preparation I mixed up both bottles of dye ready and this was a mistake because I actually only needed one, so I while I would recommend buying two boxes if you have long hair only mix up one and see how far you get.

Applying the dye was pretty easy, but I have to say it was very runny and I did make a bit of a mess with following the instructions so I ditched those and put the dye into my hands to then spread over my hair a little bit at a time.

The During:

this is my worried face
So once it was applied it was a case of setting the timer and fiddling about waiting. I have to say about 10 minutes in I was starting to get a little worried as it was starting to tingle on my head (oh yeah allergy test I never bother with that bit). But it wasn't burning and didn't persist to anything beyond a tingle so I kept waiting, I mean what's the worse that could have happened? Right!

The box claims that it actually leaves your hair in better condition and I have to say once I started to wash it out I got even more worried as my hair felt horrible. Now again I was surprised with the conditioner that came in the box, normally the little tiny tiny packets that are provided are not actually enough for my long locks but this one was hurrah. And hurrah again as after conditioning my hair did actually feel pretty good and was nicely conditioned and biggest thing of all hadn't fallen out.

The almost there:

waiting for it to dry for final colour
The after:
ta-tah 
So would I used it again? Actually I would, I think the result would have been better with Garnier Nutrisse or something like Nice 'n Easy but I was (and still am) pretty happy.

the side by side comparison 


Adventures in Dressmaking - Skirts

I have been wanting to expand my sewing skills into clothes making for a while.
I can read a pattern but for some reason the idea of making clothes seemed very scary. Cushions, bags and toys are my comfort zone.

I am from a family of sewers and I grew up watching my Mum make clothes so some stuff must have sunk in. I decided it was time to give it a go.

I picked an easy pattern pack for my first project:


I did have to google how to do the zip as the pattern instructions were not very clear. But here is my first ever skirt made from scratch.

Look at the big bunny, not my big tummy

I love this fabric 
I was really pleased with it and I am proud to wear it, but I am not totally happy with the zip (but hey first garment zip) and I found googling instructions not really that great. What I really wanted was a book with clear step by step photos and instructions and I happened to find one in Home Sense while browsing last year its Dressmaking, The complete step-by-step guide by Alison Smith (you can buy it from Amazon). Its really good and covers the basics including how to measure yourself, understanding patterns and even how to alter patterns for a better fit. It does also include 12 basic garment patterns and also has a section on mending and repairs and customising.

Almost complete
So with the aid of this book I set about making the second skirt from the pattern pack and again I am really pleased with the result and I love my fabric choice.

Sorry about the really rubbish photo


P.S both fabric are from Ikea. The top skirt the fabric was discontinued last year and the bottom skirt is this.

Saturday, 8 March 2014

Easy Muffins to Bake

I think I have been driving everyone crazy with pictures of all the Muffins I have been baking recently and then there was a little shout for the recipe.

When my fitness podcast tells me to have bit of fruit and a
glass of water this is totally what it means right!?

So here goes.

This is a really simple recipe and only takes a few minutes to get into the oven so perfect for morning bakes. I found the original recipe over on Attic24 only it was in grams and I don't do grams so I converted it (I cant say for certain how it works if you use metric weights).

I have tried other oil based muffin recipes before and always found them claggy and well not very nice but this is truly lovely and mouse recommended and I am sure you could use a non dairy milk to make them dairy free.

The Dry Ingredients
4oz (125g) Self Raising Flour
2 oz (50g) Caster Sugar
1/2 teaspoon Baking Powder

The Wet Ingredients
4 tablespoons (60ml) Milk
2 tablespoons (30ml) Sunflower Oil (you could use other oil)
1 Egg
1/2 teaspoon Vanilla Extract (you can use essence or flavouring)

The Extras
Fruit of your choice - fresh or frozen (I don't have a quantity as I add fruit to my muffin cases)
Granola to sprinkle on top prior to baking (optional)

Bake
180C / Gas 4 (for my fan oven I put it on at about 175C)
25 Minutes

Yield: 6
And according to MyFitnessPal when I put in the recipe details each muffin is about 175 calories (made with whole milk)
*Please note calorie information is not accurate as you know calculated by me and an app*

Method:
Weigh dry ingredients and place in a bowl (if you want to get all technical you should sift the flour, but who has time for that).

In a jug or another bowl measure out the wet ingredients and mix together with a fork.


Add your wet ingredients to your dry ingredients and mix together with a spoon, this will form your cake batter.


At this point you can add your fruit directly to the mix, but I prefer to wait.

Divide mix between 6 muffin cases and try to not eat too much of the raw cake mix (a weakness of mine). Now this is when I add the fruit, I generally use frozen (and in my case raspberries). I press in 3 to 4 berries per case - but experiment. I then sprinkle granola on top (you know that bit that's left at the bottom of the container that no one wants to eat? Yeah that, its perfect for use as the topping).


Put in the oven and then distract yourself while its baking. I feed the zoo, unload and reload the dishwasher etc.

And then ...


 Enjoy

Whatcha got Momma, can weez have some?


Monday, 3 March 2014

Changes

You night have noticed that I haven't been here for a year. Last year was very hard for me and culminated with me losing my job at the beginning of this year. I wont go into all the details but I have historically written about my struggles with my desk job and chronic illness. But I will say it was a toxic situation that was making more poorly. 

So what now?

I am job hunting and times are a little uncertain (food to buy, mortgage to pay etc)
But I am also using the time productively. As my health is improving I am doing more to get fit and doing all I can to keep moving and better manage my complex range of health issues. I am also teaching myself how to make clothes and getting a better focus on my business and will be launching new things this year. I am trying to spend time each week de-cluttering and sorting through things. 

Moving forwards...
I am going to blog my journey and the life stuff is going to be a bit more of the focus.
Lifestyle, being a spoonie (living with chronic illness) and there maybe a review or two along the way - things I've tried, products I use, I have also become a Bzz Agent so there may also be the occasional Bzz. 

But most importantly it will all be my own views, my own struggles and (hopefully) triumphs. 


A new way to follow...

Follow my blog with Bloglovin

Saturday, 16 February 2013

February already how did that happen?

Wow so we are already half way through February time seems to be flying by.
The New Year seems like a distant memory and spring is on the horizon.

So I came up with a plan for this year to try new things, new techniques and skills, work through WIPs, open and do the craft kits that I have brought over the years.

I aim to do at least one thing every month :)

So I have made a really good start with January and starting February being all about yarn.

I have been able to do basic knitting for years but this year I have decided to stretch myself and make things other than erm squares and scarf's and the Owl mug warmer in Mollie Makes issue 21 seemed like the perfect way to start:

I am really pleased with the result and this was my first cable knit :) Mr Mouse then spotted the wrist warmers in the same magazine that had the same owl and asked if I could knit him a pair.

Now this called for a new skill - knitting in the round. In the past I would simply have asked my Mum to help me but she is no longer here. But with the help of a really clear book that I was given for my birthday (I have awesome friends) and finding some knitting that my Mum had started to practice on I worked out how to do it.

So here are my first ever wrist warmers:

Mr Mouse loves them, though I do have to confess that the pattern confused me as for the left hand glove the instructions were just to reverse the pattern which was not a lot of help to a newbie but I found the instructions here. I did managed to miss out a row so the owl is a little miss formed on the left one, but they were made with love and that's what counts.

Still on a knitting theme I have also finished Mr Mouses Christmas present, the pieces where sat in a box waiting for me to have time to sew them together.


Its a nice big knitting blankie that he can wrap around himself.

The other yarn adventures have been all about crochet. I wonderful lady taught me the basics and from then on instructions in books became so much clearer and I decided it was time to tackle some actual patterns which then meant I had to learn the American terms and become crochet bilingual (have to confess that sometimes the American terms for the stitches make much more sense to me).

I just love making these roses:


They are available to purchase Rose Brooches are £8.50 and a single stemmed rose is £14 and can be found in my shops on etsy and folksy.

I have also made myself some rather fab leg warmers

With really cute button detail:


I have lots of exciting things lined up and look forwards to sharing.

Love Mouse
xx
Related Posts Plugin for WordPress, Blogger...